Lets chat about Canva templates. You know those moments when you want to create something but facing a blank screen feels overwhelming? Well thats when Canva templates come in handy. They offer layouts for all sorts of things like social media posts and presentations. Consider them as the base and you get to be the designer adding your personal touch. Personally I’ve found that using these templates saves me a lot of time compared to starting from scratch especially when deadlines are tight. Plus they give your work a polished look without requiring you to be a design whiz. Quite convenient dont you think?
Why Canva Templates Are Useful
When I first began using Canva I assumed that templates were meant for novices. Boy was I mistaken! Canva templates are handy for everyone regardless of how experienced you are. I can't count the number of times they've come to my rescue when I needed to create something on short notice. They're like that reliable friend who always supports you. You don't have to stress about getting the design or color balance right—everything is taken care of for you.
Here are some reasons why theyve become my top choice.
- Time-Saver: You don't need to spend hours designing from scratch. Templates give you a head start.
- Consistency: Using templates ensures your designs look uniform, especially if you're working on a series.
- Inspiration Boost: Sometimes you just need that push. Templates can spark new ideas that you wouldn’t have thought of on your own.
Whether you are a marketer juggling tasks or someone organizing a surprise birthday invitation these templates simplify things significantly.
Also Read This: How to Create an Elsa Braid with This Fun Hairstyling Tutorial
Steps to Create Canva Templates
Now let’s dive into the nitty gritty. Making Canva templates is a breeze but I do recall feeling a bit puzzled when I attempted it for the time. Here’s a straightforward rundown of how you can go about it without tearing your hair out.
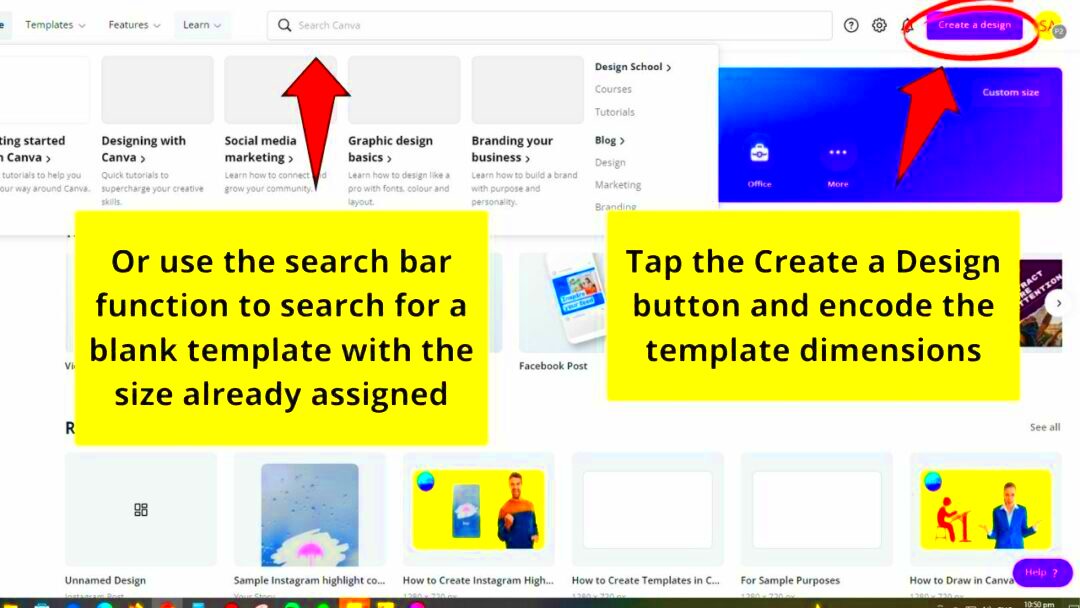
- Start with a Blank Canvas: Log into Canva, click on "Create a Design," and select the size you need. For example, if you’re making an Instagram post, choose that size. Trust me, this is the most important step—don’t end up making the wrong size like I did once!
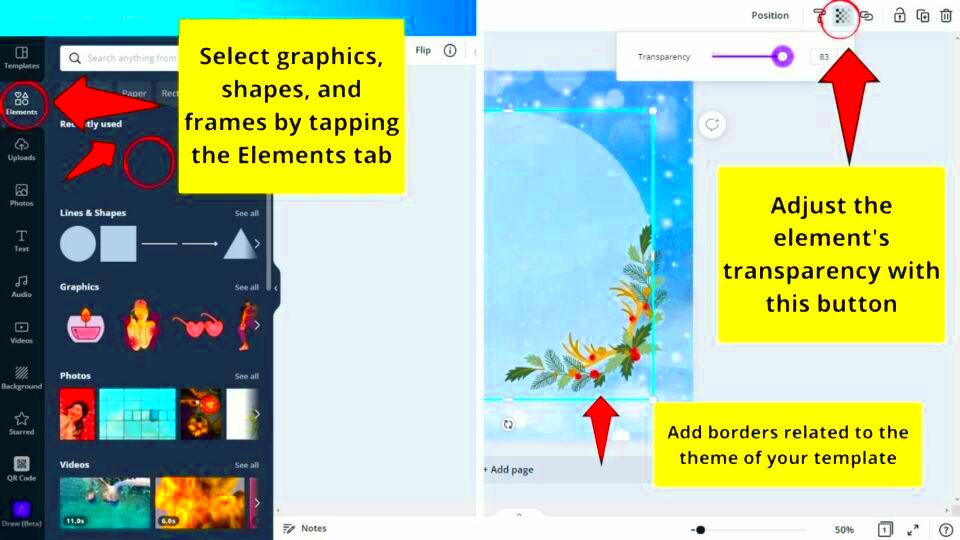
- Choose a Template or Start Fresh: You can either use a pre-made template from Canva’s library or start fresh by selecting elements, text, and photos from the sidebar. I usually browse through the templates for inspiration and tweak them as I go.
- Customize it: This is where the magic happens. Change the fonts, colors, and images to suit your style. I love experimenting here—sometimes I surprise myself with how good it looks when I step outside my comfort zone.
- Save and Reuse: Once you’re happy with the design, save it as a template. You can now use this template again and again, saving even more time in the future.
And thats a wrap! Its similar to whipping up a dish the more you practice the more efficient and skilled you become. Enjoy the creative process!
Also Read This: Enabling Subtitles and Closed Captions on YouTube TV
How to Customize Templates for Different Needs
Here are a few suggestions to adapt those templates to suit various scenarios.
- Change the Colors: This is one of the easiest ways to tweak a template. Canva’s color palette tool is a lifesaver. I often match the template to my brand colors or the theme of my content. If it’s a festive design, like for Diwali, I opt for warm tones like saffron and maroon.
- Modify the Fonts: Fonts can change the entire vibe of your design. A formal presentation? Stick to clean, professional fonts. Creating an invitation for your friend’s bachelorette? Go wild with playful, handwritten styles.
- Swap Out the Images: Canva has a great library, but I often upload my own images when I want the design to feel more personal. Whether it’s a picture of my family or a product photo for work, swapping images makes a huge difference.
- Rearrange Elements: Don’t be afraid to move things around. Sometimes I shift text boxes or resize elements until everything feels just right.
Also Read This: Is YouTube Removing Banners? The Future of YouTube Channel Art
Saving and Organizing Your Canva Templates
One lesson I’ve learned through experience is that keeping your templates in Canva is just as crucial as actually designing them. Believe me, I’ve lost track of how often I’ve made something great only to end up spending time later trying to find it. Canva offers a handy option to save your designs as templates and it really makes a difference especially when you’re juggling multiple projects simultaneously.
Here’s how I keep everything in order:
- Save Templates Properly: Once you’re done customizing a design, always hit that "Save as Template" button. This saves it in a special folder, so you won’t need to dig through your design history later.
- Use Folders: Canva allows you to create folders, and I can’t recommend this enough. I have different folders for blog graphics, Instagram posts, and even personal designs. It’s like having a digital filing cabinet, and it makes life so much easier when I’m in a hurry.
- Name Your Templates Clearly: I made the mistake of not naming my designs properly at first. Trust me, naming them helps—especially when you have a bunch of templates with random names like "Untitled Design #5."
Common Mistakes to Avoid While Designing Templates
When I began creating templates in Canva I stumbled upon quite a few blunders. It’s all part of the process but certain errors can be sidestepped if you’re aware of what to watch for. So let me share a few insights that I wish someone had shared with me, from the start.
- Overloading with Too Many Elements: Less is more when it comes to design. I used to cram in too many images, icons, and text boxes, thinking it would make my design look "full." Instead, it made everything look messy. Stick to a few well-placed elements and let them breathe.
- Ignoring White Space: Don’t underestimate the power of empty space. White space gives your design room to breathe and draws attention to the important parts. I used to fill every corner, and it made my designs look cramped. Trust me, white space is your friend.
- Poor Font Choices: I used to combine too many fonts, thinking it made my design "unique." It didn’t—it just made it hard to read. Stick to 2-3 fonts at most, and make sure they complement each other. Canva’s font pairing tool can help if you’re unsure.
- Using Low-Quality Images: Canva has high-resolution options, but I made the mistake of uploading some low-quality photos from my phone. It showed! Always use high-resolution images to keep your design looking sharp and professional.
Steering clear of these typical missteps will assist you in crafting designs that appear refined and sophisticated. To be truthful once you grasp the process it becomes a breeze moving forward!
- Are Canva templates free?
Well, here’s the thing: Canva offers both free and paid templates. The free ones are great for most needs, but if you’re looking for something a little extra, like premium fonts or images, you might need to spring for a Pro account. I’ve used both, and honestly, the free templates work wonders in most cases. - Can I share a template with someone else?
Yup! One of the cool things about Canva is that you can share your templates with others, either by sending them a link or adding them as collaborators. I’ve done this when working with teams on projects, and it’s super handy. - How do I maintain consistency across all my designs?
It’s simple: Stick to the same colors, fonts, and overall style when customizing your templates. I like to save specific color palettes and font choices in my Canva account to ensure everything stays consistent. This helps a lot when you’re creating designs for the same brand or project.