Have you ever been in a situation where you're looking at a screen blank trying to come up with something visually appealing but feeling completely stuck? I totally get it! Canva templates serve as your beacons in the expansive world of design. They streamline the process for you so that you can concentrate on being creative instead of beginning from square one.
Templates serve a variety of functions. They help you stay organized saving you valuable time, when deadlines approach. Additionally they can spark your creativity. Whether you're creating a post a presentation or a promotional flyer there's probably a template that aligns with your ideas. With Canva's interface you can effortlessly customize these templates to make them uniquely yours. Here's why they are so important:
- Saves Time: No need to reinvent the wheel; simply tweak existing designs.
- Promotes Consistency: Maintaining a cohesive look across various platforms.
- Encourages Creativity: Templates spark ideas that might not have crossed your mind.
- Professional Look: Even beginners can create stunning visuals with minimal effort.
In a realm dominated by imagery Canva templates serve as your trusted counsel. They steer you offer support and add a touch of fun to your design journey!
Steps to Access Canva Templates for Resizing
Having highlighted the significance of templates lets explore how to get your hands on them. Its simpler than you may imagine. I recall my initial experience with Canva; it was as if I stumbled upon a goldmine of creative options! Here’s a breakdown of how you can discover and utilize Canva templates:
- Sign Up or Log In: If you don’t have a Canva account, create one. It’s free and straightforward!
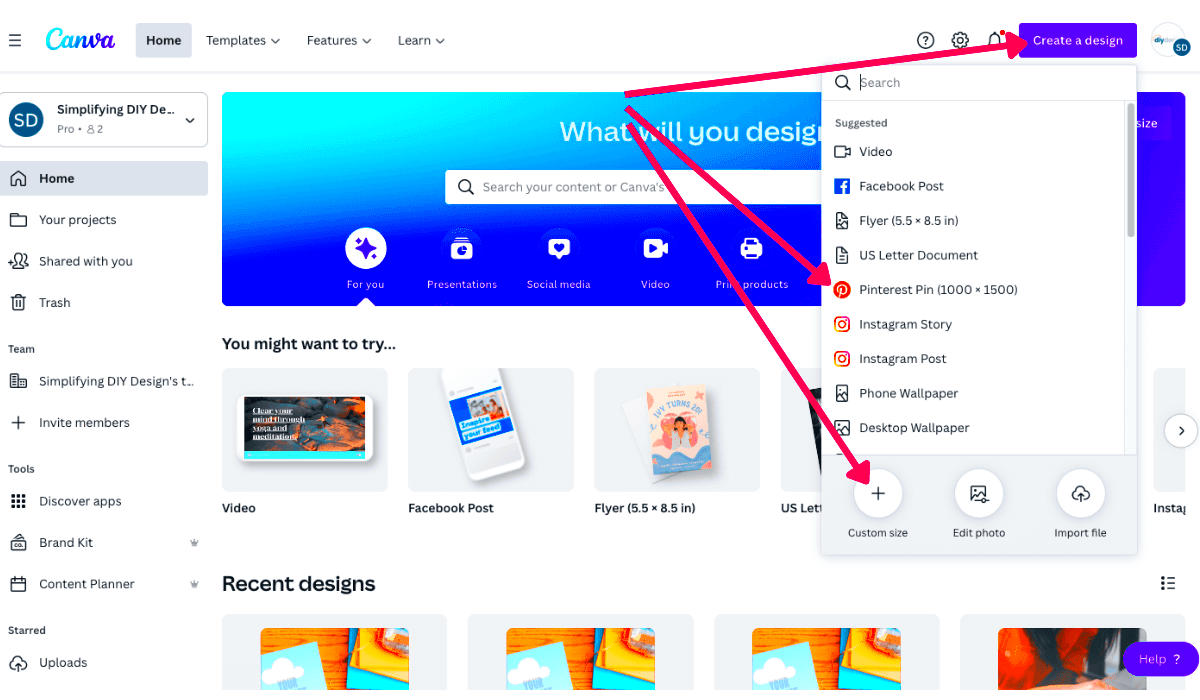
- Navigate to the Template Section: On the homepage, look for the “Templates” option in the top menu.
- Choose a Category: Browse through various categories, such as social media, presentations, or posters.
- Select a Template: Click on a template that catches your eye. You can preview it to see if it suits your needs.
- Edit Your Template: Once you’ve chosen a template, click “Use this template” to start customizing.
By following these steps you’ll be well on your journey to discovering the ideal template for your project. Every creative individual should relish the pleasure of customizing a template to align with their vision!
Also Read This: How the Shutterstock Free Trial Works and What You Get
How to Resize Canva Templates Efficiently
After selecting a template the next step is adjusting its size to suit your requirements. Resizing may seem intimidating but believe me it’s quite simple! I remember feeling slightly overwhelmed during my initial attempt at it. However with some practice it soon became second nature.
Here’s a simple step by step guide to resizing your Canva templates effectively.
- Open the Template: Start by opening the template you want to resize.
- Click on Resize: On the top toolbar, find the “Resize” button. This feature is available for Canva Pro users. If you’re using the free version, you can still copy the design to a new size.
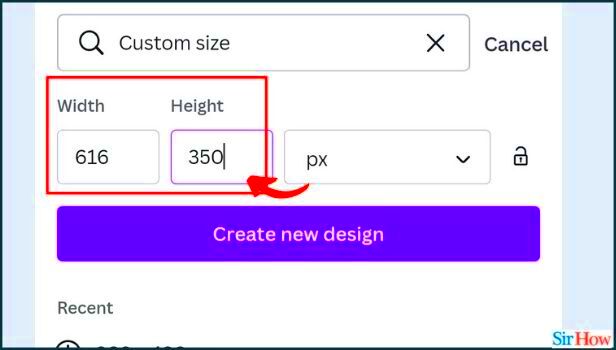
- Select Dimensions: Enter the new dimensions you need. Canva provides preset sizes for various platforms, making it even easier.
- Adjust Elements: After resizing, check if any elements need repositioning or resizing themselves. This might include text boxes, images, and graphics.
- Preview and Download: Once you’re satisfied with the adjustments, preview your design. If everything looks good, download your masterpiece!
While resizing may appear to be a bit of an inconvenience initially with time and practice it can turn into a seamless task. Embrace it as an aspect of your artistic path!
Also Read This: The Rise of User-Generated Content: How to Curate and Use Images Ethically
Best Practices for Resizing Canva Templates
Resizing Canva templates is a bit like balancing on a rope, one misstep and everything can feel out of sync. I recall my initial attempt at resizing a flyer I created for a friends birthday celebration. I was eager yet nervous about achieving the appearance. With time I picked up some tips that not only made the process easier but also enhanced my designs considerably. Here are a few suggestions to assist you in getting it right.
- Maintain Aspect Ratio: Always keep the aspect ratio in mind. It prevents distortion. Canva usually does this automatically, but it’s good to double-check.
- Adjust Elements Individually: After resizing, go through each element. Sometimes text boxes or images don’t scale properly. Take a moment to adjust them to fit the new dimensions.
- Use Guides and Grids: Utilize Canva’s guides and grid lines to align elements properly. This will help in maintaining a professional look.
- Check Readability: Ensure that your text remains legible after resizing. Sometimes, smaller text can become difficult to read, so don’t hesitate to adjust font sizes.
- Preview Before Downloading: Always preview your resized design. It’s a great way to catch any last-minute tweaks that might be needed.
By adhering to these guidelines you can significantly enhance the quality of your designs. Keep in mind that every adjustment is a part of your creative exploration so welcome the journey!
Also Read This: A Guide to Fortiguard Downloader’s Intrusion Prevention Whitelist
Common Issues When Resizing and How to Fix Them
When I began my journey with Canva I faced some challenges here and there particularly when it came to resizing templates. It could be quite exasperating at moments similar to attempting to squeeze a square peg into a round hole. However over time I became adept at recognizing and addressing these recurring problems. Here are a few obstacles you may encounter along with their solutions.
- Images Blurring: If your images become pixelated after resizing, it’s usually because the original resolution was low. To fix this, try to use high-resolution images whenever possible. You can also replace the blurry image with a clearer version.
- Text Overlapping: Sometimes, resizing can cause text boxes to overlap or get misplaced. To fix this, click on the text box and drag it to the desired location. Adjust the font size if necessary to ensure everything fits well.
- Misaligned Elements: After resizing, elements may not align as they should. Use Canva’s alignment tools to distribute elements evenly. It’s like tidying up your room; everything just looks better when it’s in its right place!
- Aspect Ratio Problems: If the aspect ratio is off, you might end up with a distorted design. Always resize by maintaining the aspect ratio to keep your design looking proportional.
By recognizing these challenges you can address them directly and enhance your design workflow. Keep in mind that each error is merely a stepping stone towards becoming a more skilled designer!
Also Read This: Develop Proposals with Canva Proposal Template
Exploring Additional Tools for Image Resizing
Although Canva is a fantastic design platform there are times when you may want to check out alternative tools for resizing images. Personally I’ve discovered that using a mix of tools can improve my design process. Whether you’re looking for additional features or simply a different approach here are some options you could think about.
| Tool | Best For | Features |
|---|---|---|
| Adobe Photoshop | Advanced Editing | Layering, advanced filters, and high-resolution outputs. |
| PicResize | Quick Resizing | Simple interface, batch resizing, and cropping options. |
| GIMP | Open-Source Editing | Comprehensive editing tools similar to Photoshop. |
| ResizeImage.net | Online Resizing | Upload and resize images without complicated software. |
Every tool brings its own advantages to the table. Canva excels in design but having a diverse set of resources at your disposal can enhance your project efficiency. Take the time to explore these alternatives and discover which ones align with your personal taste!
Also Read This: Craft Informative Pamphlets with Canva Pamphlet Template
Tips for Maintaining Image Quality During Resizing
When I started my journey in graphic design one of the challenges I encountered was preserving the quality of images during resizing. It’s akin to squeezing into your beloved dress after a few months—sometimes it just doesn’t quite fit the same! But don’t worry; there are methods to keep your images looking crisp and polished, even after making adjustments. Here are a few tricks that have proven to be effective for me.
- Start with High-Resolution Images: Always begin with the highest resolution image possible. It makes a significant difference when you resize. I learned this the hard way when a beautiful picture turned into a pixelated mess!
- Use PNG or SVG Formats: These formats are designed for scalability without losing quality. They are especially great for logos and illustrations, maintaining crisp edges even when resized.
- Avoid Excessive Scaling: Try to limit how much you scale an image up or down. A little adjustment is fine, but drastic changes can lead to loss of quality. I always aim for minor tweaks.
- Utilize Canva’s Built-In Features: Canva has tools that help preserve image quality. When resizing, make sure to check the “Lock Aspect Ratio” option to prevent distortion.
- Preview Your Design: Before finalizing, always preview your design to catch any quality issues. It’s like taking a final look in the mirror before heading out!
By remembering these suggestions, you can preserve the beauty of your designs adding to the richness of your creative process.
Also Read This: Canva Image Outline Creation
Frequently Asked Questions About Resizing Canva Templates
While exploring Canva I often came across questions that hung in the air like the scent of tea. Whether you're a beginner or a seasoned Canva user you may have some doubts regarding template resizing. Here are some common inquiries that can help dispel the confusion:
- Can I resize a Canva template for free? Yes, you can resize templates in the free version, but the “Resize” tool is only available for Canva Pro users. You can copy the design to a new size if you're using the free version.
- What happens to my design elements when I resize? Most elements should adjust automatically, but some may need manual repositioning or resizing, especially text and images. It’s always good to review your design after resizing.
- How can I maintain the quality of images when resizing? Starting with high-resolution images, using appropriate formats like PNG or SVG, and limiting how much you scale an image will help maintain quality.
- Is there a maximum size limit for resizing? Canva has its limits, but you can always check the template dimensions and ensure they fit within your requirements. If needed, start with a larger size and scale down.
- Can I convert a template to a different format? Absolutely! After resizing, you can download your design in various formats such as PNG, JPG, or PDF, depending on your needs.
These inquiries frequently arise during discussions with other designers. Keep in mind that each question brings you closer to honing your skills!
Conclusion on Resizing Canva Templates
As I conclude this deep dive into adjusting Canva templates I find myself reminiscing about my personal path in the world of design. It has been a rollercoaster ride with its share of hurdles missteps and above all valuable lessons. Resizing templates goes beyond altering measurements; it involves grasping the delicate balance between preserving essence and adapting to diverse formats.
By incorporating the suggestions and techniques outlined in this article you’ll not only improve your design abilities but also find greater joy in the creative journey. Keep in mind that each adjustment you make presents a chance to showcase your individuality and perspective. Its about taking a framework and reshaping it to mirror your imagination.
The next time you embark on a design project embrace the process with both self assurance and a sense of wonder. You might be surprised by the breathtaking ideas that come to life when you hit that resize button. Wishing you a joyful design journey!