Canva has become a favorite tool for many creative individuals, whether they are seasoned designers or simply looking to create an eye catching presentation. One aspect that I truly love is the option to fill shapes with images. It’s a straightforward yet impactful feature that can elevate your designs in surprising ways. I still recall the moment I discovered this capability; it was like a revelation. Instead of sticking to ordinary shapes I could now incorporate my cherished photos adding a personal flair to my creations. It felt like a triumph and that’s what Canva represents, making creativity available to all.
Exploring the Benefits of Using Image Fill in Shapes
Incorporating images into shapes goes beyond mere visual appeal; it brings richness and personality to your creations. Here are some compelling reasons to explore this functionality:
- Enhanced Visual Appeal: Images can evoke emotions that plain shapes simply cannot. A beautifully filled shape can draw viewers in and keep them engaged.
- Personalization: By using your images, you make your design unique. Whether it's a family photo or a snapshot from your travels, it tells your story.
- Versatility: This feature works well for various projects, from social media posts to business presentations, ensuring that you can create something eye-catching for any occasion.
Also Read This: Imago Stock Photos: Stunning Website Content
Step-by-Step Guide to Fill Shapes with Images in Canva
Lets explore the process of using images to fill shapes in Canva. Its simpler than you may imagine. Here are the steps to follow.
- Open Your Canva Project: Start by creating a new design or opening an existing one.
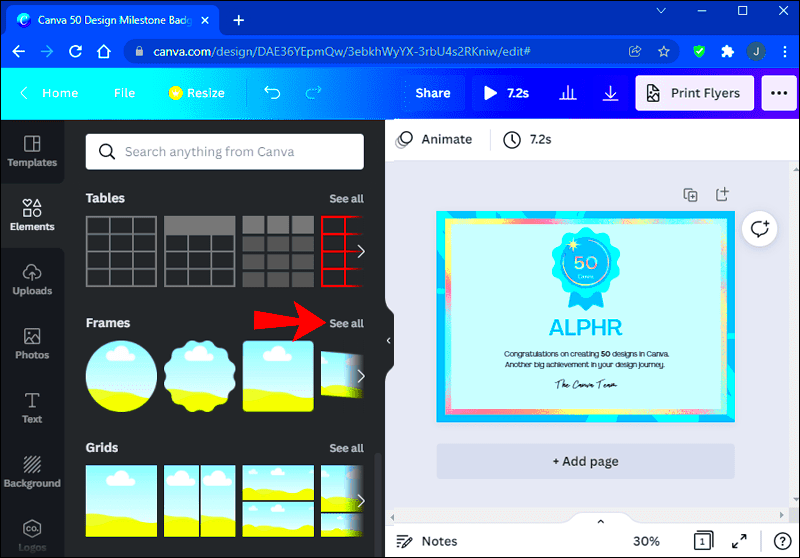
- Select a Shape: Click on the “Elements” tab on the left sidebar. Choose a shape that suits your design.
- Add an Image: Click on the “Uploads” tab to select an image from your computer, or use the “Photos” section to find one from Canva’s library.
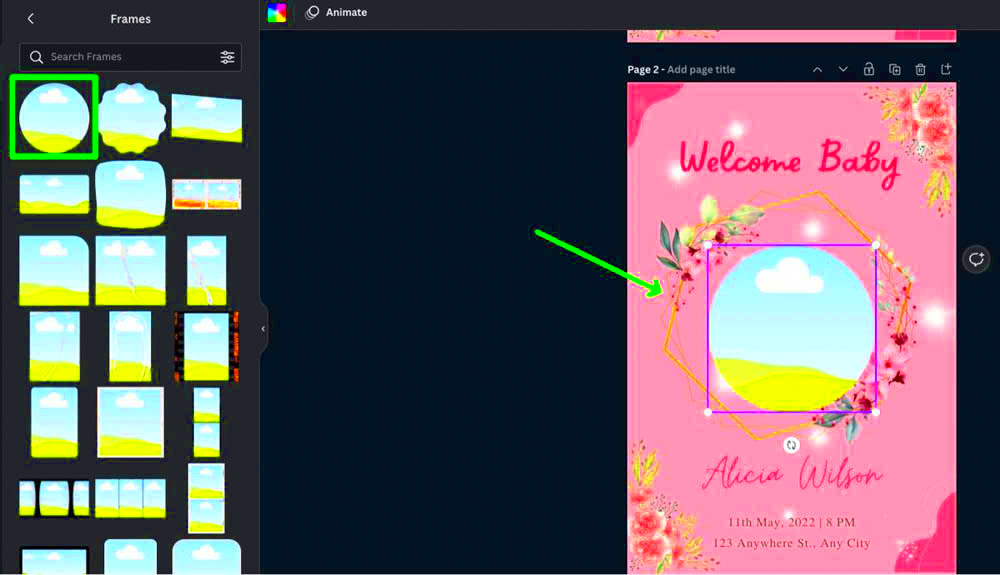
- Fill the Shape: Right-click on the shape you’ve added and select “Fill with Image.” You’ll see your image appear within the shape.
- Adjust as Needed: You can double-click on the shape to reposition the image or adjust its size to fit perfectly.
And there you have it! An easy process that can completely transform the appearance of your design. I recall the excitement I felt when I first experimented with this technique it was as if I had discovered a fresh dimension of creativity.
Also Read This: Men's Royal Rumble 2022 Winner Revealed
Tips for Choosing the Right Images for Shape Filling
Selecting images to complement your shapes in Canva can have a significant impact. Its akin to picking the spices for a curry; using the ones can ruin the whole meal! In the beginning I used to choose images purely based on how they looked without considering their significance. However with time I discovered that the narrative behind an image is what truly counts. Here are a few suggestions to help you make choices:
- Consider the Context: Think about the message you want to convey. For instance, a serene landscape can evoke calmness, while vibrant city life can create excitement.
- Focus on Clarity: Ensure the image is high-resolution. Blurry images can diminish the professional look of your design.
- Match the Color Scheme: Choose images that complement your overall color palette. This creates harmony and makes your design visually appealing.
- Think About Emotions: Images can stir feelings. Select ones that resonate with your audience's emotions and align with your design’s purpose.
- Stay Authentic: Use personal images where possible. Whether it’s a family gathering or a scenic trip, your memories add a personal touch that stock photos often lack.
Based on what I’ve seen choosing the images can really take your designs to the next level. It’s important not to hurry through this process; instead invest time in finding images that align with your narrative.
Also Read This: Guide to Removing Contacts from Telegram and Managing Your List
Common Mistakes to Avoid When Using Image Fill in Canva
Even experienced designers can make mistakes when it comes to using image fills in Canva. I’ve definitely had my moments that taught me important lessons. Here are some common errors to avoid.
- Ignoring Image Quality: Using low-resolution images might save time initially, but they will haunt you later when your design looks pixelated. Always prioritize quality!
- Overcomplicating the Design: Sometimes, less is more. Avoid filling every shape with intricate images, as this can overwhelm the viewer.
- Neglecting Alignment: A misaligned image can disrupt the flow of your design. Ensure that your images fit snugly within the shapes.
- Forgetting to Resize: If your image doesn’t fit well within the shape, don’t hesitate to adjust it. A little tweaking can make a big difference.
- Not Using Transparency: Adding transparency can soften the image and integrate it better with the background. Don’t be afraid to experiment!
I've come to realize that being aware of these common missteps can help you avoid wasting time and feeling frustrated. Every design presents a chance to learn, so let's welcome it with open arms!
Also Read This: YouTube's Quality Issues Explained with Effective Solutions
Advanced Techniques for Creative Shape Filling
Once you have a good grasp of the fundamentals of shape filling in Canva you can let your imagination run wild! I love to try out different methods that give my designs a special touch. Here are some clever approaches that might spark your creativity:
- Layering Images: Instead of just filling a shape with one image, try layering multiple images to create depth. Adjust their opacity to allow some images to peek through.
- Using Patterns: Instead of solid images, consider filling shapes with patterns. Canva offers various patterned backgrounds that can add interest without being too overpowering.
- Incorporating Textures: Adding a textured image as a fill can give a tactile feel to your designs. Think of wooden textures or fabric patterns for a warm touch.
- Creating Cutouts: By using the “Crop” feature creatively, you can create interesting cutouts within shapes, adding a surprising element to your design.
- Playing with Gradients: Combine image fills with gradient overlays. This can give your shapes a modern look while maintaining visual interest.
Whenever I play around with these methods I get this sensation of being an artist working on a canvas. Its such a rush to bring something completely original to life. So go ahead and push the boundaries of your imagination and let your creative juices flow freely!
FAQs about Canva Shape Filling with Image
As I explored the shape filling options in Canva I came across many inquiries from other users. I’ve compiled a list of the questions that I believe can assist you in making the most of this wonderful feature. Lets tackle these questions together.
What types of images work best for filling shapes in Canva?
Choosing images with quality is always a smart move. They bring out clarity and a touch of professionalism. Personally I lean towards images featuring backgrounds to avoid any conflicts with the design of the shape.
Can I use transparent images for shape filling?
Absolutely! Transparent PNG files are great because they let the edges of shapes blend smoothly with your design. Ive employed this method to craft visuals that have a harmonious and cohesive look.
How can I adjust the image after filling the shape?
Once you fill a shape just double click on it to move or resize the picture. This handy tool has spared me a lot of time and annoyance in my quest for the fit.
Is there a limit to how many images I can use for shape filling?
While there isn't a hard and fast rule regarding the number of images it's best to avoid overloading your design. Personally I prefer to limit myself to one or two images per shape to maintain a polished appearance.
Can I animate the shapes filled with images?
Absolutely! Canva lets you animate shapes and I enjoy trying out various animations to add some flair to my creations.
Are there any restrictions on image usage?
Absolutely make sure to verify the licensing of the images you utilize. Although Canva offers an extensive collection of images some come with a fee and it’s crucial to follow copyright regulations.
Conclusion on Using Image Fill in Canva
Using image fill in Canva is a great way to elevate your designs and make them more personal. It turns simple shapes into visual elements that connect with your audience. While trying out various techniques keep in mind that there are no limits to creativity. Your experience with Canva can be both rewarding and enjoyable so embrace the learning journey and let your individuality shine through!