Canva Image Shaping is a great way to give your photos a unique twist and make them more eye catching. I still recall the moment I began using Canva and was amazed at how effortless it was to craft one of a kind designs even without advanced design abilities. With this feature you can turn ordinary pictures into visually appealing forms like circles, stars or even custom shapes. I rely on this tool whenever I want to whip up something quickly while still infusing a touch of creativity into it. It's ideal for adding that extra flair to your social media updates, presentations or personal projects too.
Canva allows you to do more than simply crop images. You can customize them, give them a unique touch and truly make them yours. This small functionality has revolutionized my blog layouts and I can't envision reverting to basic rectangular shapes!
How to Use the Canva Image Shaping Tool
Using the Canva Image Shaping tool is super easy and I assure you don't require any technical skills to begin. Here's my approach to it
- Step 1: Open Canva and either create a new design or open an existing one. I usually start from scratch with a blank canvas because I like to experiment.
- Step 2: Upload your image or choose from Canva’s built-in library. Sometimes, I spend hours browsing through the images because there’s just so much variety!
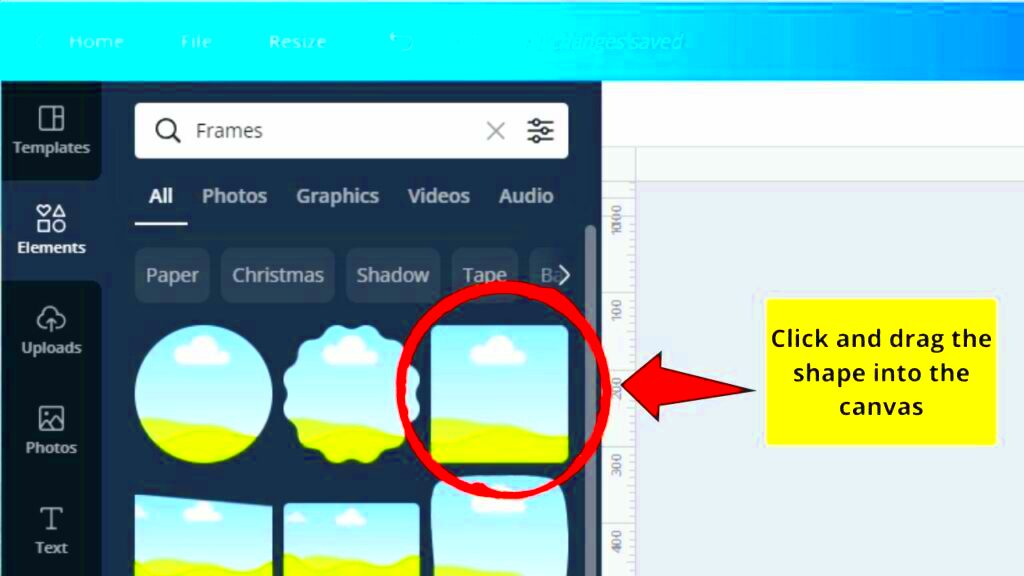
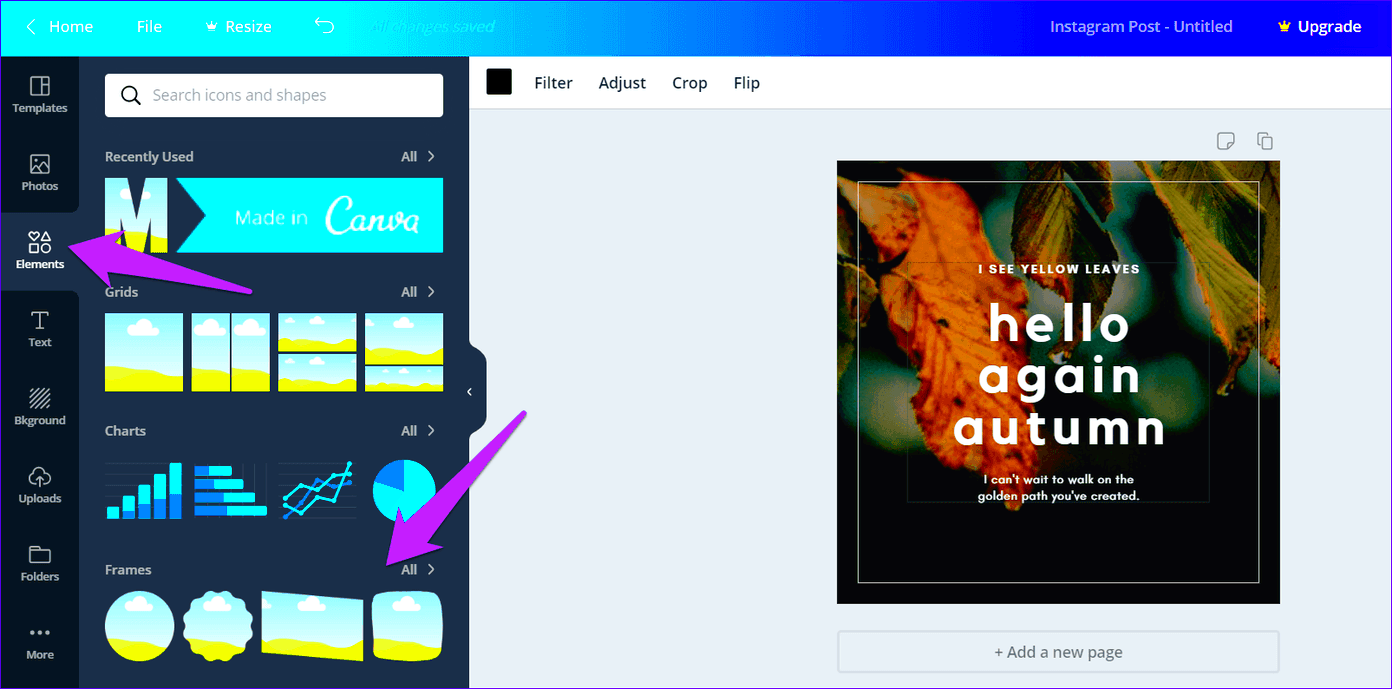
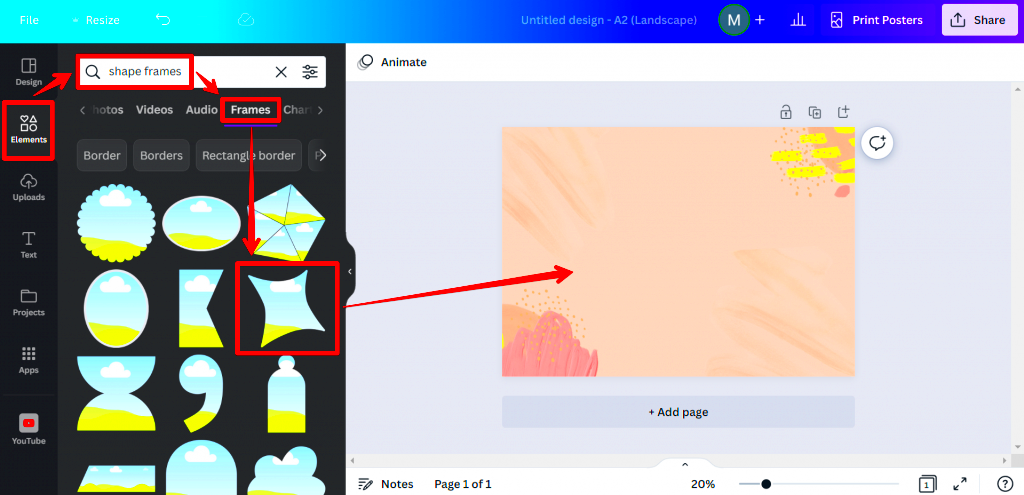
- Step 3: Select the image and click on the "Effects" button. From here, choose the "Shapes" option.
- Step 4: Pick your desired shape. You can choose a circle, square, or something funky like a heart or star. I love the heart shape for personal projects—it adds a warm, cozy vibe.
- Step 5: Adjust the size, position, and effects of the shaped image as you like. Canva makes it super easy to drag and resize things. It feels like playing with digital clay!
Thats it! With a simple click you can turn your image from a plain rectangle into something eye catching. I vividly recall using the star shape for one of my birthday invitations. It truly made a difference!
Also Read This: Usos Comunes de Telegram entre los Hombres
Creative Ways to Shape Your Images in Canva
Now things are about to get exciting. I’ve been playing around with Canva’s image shaping feature for quite some time now and it honestly feels like a creative playground. Let me share some of the fun ways I’ve transformed images using Canva.
- Making Social Media Posts: I once took a basic travel photo and shaped it into a circle with a gradient border. Suddenly, my simple Instagram post had a magazine-like feel to it. People started asking me which app I used!
- Crafting Unique Blog Banners: For my blog, I shaped images into triangles to give them a modern, edgy look. It made my posts pop and gave a distinct feel to my website.
- Custom Greeting Cards: Last Diwali, I made greeting cards using heart-shaped images. The recipients couldn’t stop asking where I got them printed. Little did they know, it was all Canva!
- Creating Personal Scrapbooks: I love using Canva for personal memories. I shaped old family photos into circles and stars for my digital scrapbook. It was a great way to relive those moments in a fresh, creative way.
What I’ve come to understand is that crafting visuals goes beyond mere looks. It involves weaving a narrative. Every form elicits an emotion and aids in conveying the sentiment embedded within the picture. With Canva you have the freedom to experiment with fresh ideas, each time.
Also Read This: John Cena's Royal Rumble Victories A Historical Overview
Benefits of Using Canva for Image Shaping
Canva has really become my favorite tool for creating visuals, especially when it comes to customizing them. I wasn't always this adept with technology but Canva has simplified the process for me allowing me to create designs that have a touch. It's not just about looking good; it's about streamlining the design process without sacrificing quality. Sometimes I find myself questioning why I used to spend time battling with complex software when Canva makes everything feel so intuitive.
Here are a few key advantages that I have personally encountered.
- User-Friendly Interface: You don’t need to be a tech whiz to figure out Canva. It’s so intuitive that even my cousin, who’s new to the internet, could create something amazing within minutes!
- Huge Library of Shapes: Canva has a variety of shapes—from simple circles and rectangles to custom, funky designs like stars, hearts, and clouds. Once, I used a cloud shape for a baby shower invite, and people thought I had a graphic designer on speed dial!
- Cost-Effective: Many of Canva’s features, including image shaping, are available in the free version. This was a huge bonus for me when I was just starting out and didn’t want to spend too much money on design tools.
- Customization: Not only can you shape your images, but you can also customize them with filters, text, and even animation. I used this for a friend's wedding announcement, and the blend of shapes with elegant text made the invite really stand out.
In a society obsessed with aesthetics Canva empowers me to unleash my creativity without the need for costly design software or bringing on board a pro. Its the small details that truly matter.
Also Read This: How Much Money Can You Make Selling Videos on Shutterstock
Best Practices for Shaping Images in Canva
Just like with any tool there’s a certain skill involved in using Canva's image shaping features effectively. Through my experience I’ve picked up some tips that enhance my use of the platform. While it's simple to shape images there are techniques to make sure the end result appears refined and professional. Allow me to share what has proven to be most successful for me.
Check out my best advice for maximizing the potential of Canva's image shaping feature.
- Choose the Right Shape for the Right Purpose: If you’re creating something for social media, circles and squares work best as they are visually appealing and don’t distract from the content. For blog banners, I often go for more unique shapes like triangles or even abstract ones to give it a creative edge.
- Maintain Image Quality: Canva allows you to resize images within shapes, but be careful not to overdo it. Over-resizing can lead to pixelation, which doesn’t look good in the final design. I once resized a photo way too much for an event flyer and ended up with a blurry mess!
- Play with Transparency and Layers: One of my favorite tricks is to adjust the transparency of the image or layer multiple shapes. This technique adds depth to designs and gives them a more professional feel. I used this for a New Year’s post and it really added a festive vibe.
- Stick to a Theme: Consistency is key. If you’re shaping multiple images for the same project, make sure they follow a similar style or shape pattern. For my blog, I usually stick to circular images to maintain visual harmony across the site.
By adhering to these guidelines I have successfully steered clear of the usual traps and fully utilized Canvass fantastic functionalities. Give it a shot—youll be amazed at how swiftly you can progress from a novice to an expert!
Also Read This: Behance photo download guide
Common Mistakes to Avoid While Shaping Images
I’ve had my share of blunders when crafting visuals in Canva and let me tell you some of them are pretty avoidable. It’s only normal to feel thrilled with the array of tools available to you but there are a few pitfalls to be mindful of if you want your creations to truly stand out.
Here are a few errors I frequently come across and tips on how to avoid them.
- Overcomplicating the Design: I remember when I first started, I was so thrilled with all the options that I ended up cramming too many shapes into one design. Less is often more. Keep your designs simple and clean for the best impact.
- Ignoring Alignment: Canva’s grid and alignment tools are there for a reason. It’s easy to get carried away and position elements randomly, but trust me, uneven alignment stands out in the wrong way. I once made an entire set of Instagram posts that looked haphazard because I didn’t pay attention to this.
- Choosing the Wrong Shape: Every shape conveys a certain mood. Using a circle for a serious business presentation might not always work, just like using a triangle in a baby shower invite can feel a bit odd. Always match the shape to the vibe of the project.
- Not Saving Properly: Canva is great for cloud-based design, but always double-check that your work is saved properly. I once lost an entire project because I closed the browser without saving it! Now, I make sure to save regularly, especially when I’m deep into a creative flow.
- Forgetting to Check the Mobile View: If you’re creating designs for digital use, always preview them on a mobile device. I’ve had moments where my designs looked amazing on a computer screen but didn’t translate well to mobile. Canva has a preview option—use it!
Through reflecting on these missteps, I have improved my design workflow and produced significantly enhanced visuals that exude a more polished appearance. Paying attention to the nuances can greatly impact the way images are crafted in Canva.
Also Read This: Cómo Subir Contenido a iStock para Nuevos Contribuidores
Canva Image Shaping vs Other Tools
Throughout my journey with design tools, I've come across numerous options, yet Canva shines brightly for image editing. Its user friendly interface and extensive range of features make it a perfect fit for individuals like me who seek professionalism without investing extensive time in mastering the software. Allow me to provide you with a brief comparison between Canva and some other widely used tools that I've had experience with.
| Feature | Canva | Other Tools (Photoshop, GIMP, etc.) |
|---|---|---|
| Ease of Use | Canva is incredibly user-friendly. Even if you’ve never designed anything before, you can figure it out within minutes. | Tools like Photoshop have a steep learning curve. It took me weeks to get the hang of it, and even now, I only use a fraction of the features. |
| Shapes & Templates | Canva offers a wide range of pre-designed shapes and templates, perfect for any project. I love how I can just drag and drop elements. | Other tools offer more customization, but they can be overwhelming with too many options and no ready-to-use templates. |
| Cost | Most of Canva’s basic features, including image shaping, are free. This is a huge plus for anyone starting out. | Tools like Photoshop require a paid subscription, which can be expensive if you’re only using it for occasional projects. |
| Time Investment | With Canva, I can create a shaped image in minutes. It’s really about efficiency. | Other tools take longer. Between opening the program and navigating the complex menus, a quick design can turn into a lengthy process. |
I find Canva to be the ideal tool for quickly creating sleek and imaginative designs without the hassle of using complex software. There was this one time when I attempted to crop an image in Photoshop and it took me an hour to achieve what Canva effortlessly helped me do in just five minutes. The true charm of Canva lies in its ease of use.
Also Read This: Design Giving Tuesday Campaigns with Canva Giving Tuesday Templates
Frequently Asked Questions (FAQ) about Canva Image Shaping
Whenever I mention the image shaping capabilities of Canva I tend to receive a flurry of inquiries from friends and coworkers who are intrigued by its functionality. Here are some of the frequently asked questions I encounter.
1. Can I use custom shapes in Canva?
Absolutely! Canva provides a variety of preset shapes, but you also have the option to upload your own elements and images to customize them however you prefer. I’ve even brought in my sketches and transformed them into unique shapes!
2. Is Canva's image shaping feature available in the free version?
Certainly! The complimentary edition of Canva provides you with a wide range of shapes and effects. Although certain advanced functionalities are restricted to the Pro version I have discovered that the free tools are more than adequate for the majority of projects.
3. Can I edit the shape after applying it to an image?
Absolutely! With Canva you have the freedom to resize reposition and make adjustments to your image shape to your hearts content. I really appreciate its flexibility that lets you change your mind along the way since I tend to make several tweaks before settling on a design.
4. How do I maintain the quality of my image when shaping it?
To ensure the picture stays clear refrain from scaling it up excessively within the frame. Canva does a decent job preserving quality but it's advisable to begin with images if you intend to make substantial adjustments.
5. Can I collaborate with others on Canva?
Absolutely, the collaboration feature in Canva is fantastic. It allows you to invite colleagues to collaborate on a project simultaneously. I frequently utilize this function when handling assignments and it really streamlines the process.
Conclusion: Why Canva Is Perfect for Image Shaping
Canva has really become an essential tool in my design arsenal, particularly when it comes to editing images. While I’ve tried out other design software before I find that Canvass user friendly interface, diverse features and effectiveness set it apart. Whether Im whipping up a social media post or tackling a more complex task like designing a wedding invitation Canva always delivers results.
What I love about Canva is that it lets you unleash your creativity without the stress. I recall my initial attempt at editing images and I had no prior design skills. However with Canva I was able to whip up designs that garnered compliments in just a few minutes. The convenience of selecting a shape or personalizing it adds those subtle details that truly set it apart.
If you havent given Canva a shot for editing images I highly recommend it. You dont have to be a designer and the outcomes are consistently impressive. Its an ideal choice for those of us who enjoy exploring our creativity while keeping things straightforward.