Welcome to the vibrant world of Behance! If you're a creative looking to showcase your work, you’ve landed in the right place. Behance is a fantastic platform where artists, designers, and creators from all walks of life can display their portfolios, connect with others, and even land job opportunities. In this quick tutorial, we’ll guide you through the steps to create a
Creating a Behance Account
Getting started on Behance is a breeze! Here’s a step-by-step guide to help you create your account:
- Visit the Behance Website: Go to behance.net. You’ll be greeted by a stunning array of creative projects.
- Click on “Sign Up”: You’ll find this option in the upper right corner. Click it to begin the registration process.
- Choose Your Sign-Up Method: Behance offers several ways to sign up:
- Email: Fill in your email address, create a password, and select your country.
- Social Media: You can use your Adobe ID, Facebook, or Google account for quicker access.
- Complete Your Profile: After signing up, you’ll be prompted to complete your profile. Make sure to add a profile picture, a short bio, and links to your social media accounts. This helps others connect with you better!
- Verify Your Email: Check your inbox for a verification email from Behance. Click the link to confirm your account.
And voila! You’re now part of the Behance community. With your account ready, you can start exploring other artists' work, comment on projects, and, of course, upload your own creations. It’s time to show the world what you can do!
Also Read This: The Importance of LinkedIn for Networking and Career Growth
Navigating the Behance Interface
Getting accustomed to the Behance interface can feel a bit overwhelming at first, but once you get the hang of it, you'll find it to be a user-friendly platform designed for showcasing your creative work. Let’s break it down!
When you log into Behance, you’ll land on your dashboard. Here’s what you’ll typically see:
- Top Bar: This includes a search bar, notifications, and your profile picture. You can quickly access your settings or log out from here.
- Explore Section: Click on "Explore" to discover projects by other users. This is a fantastic way to get inspired and see what’s trending.
- Projects Tab: Here, you can find all your uploaded projects. It’s like your personal portfolio space!
- Community: This is where you connect with other creatives. You can follow users, appreciate their work, and even comment on their projects.
Familiarizing yourself with these sections is crucial. Spend a few moments clicking around and exploring. The more comfortable you are with the interface, the easier it will be to add your projects and engage with the community!
Also Read This: Imago Stock Videos: Your Brand’s Story
Steps to Add a New Project
Ready to showcase your work to the world? Adding a new project on Behance is a straightforward process. Follow these simple steps:
- Log In: First, log in to your Behance account. If you don’t have one, signing up is quick and easy!
- Click on “Create a Project”: Once you’re on your dashboard, look for the “Create a Project” button, usually located at the top right corner. Go ahead and click that!
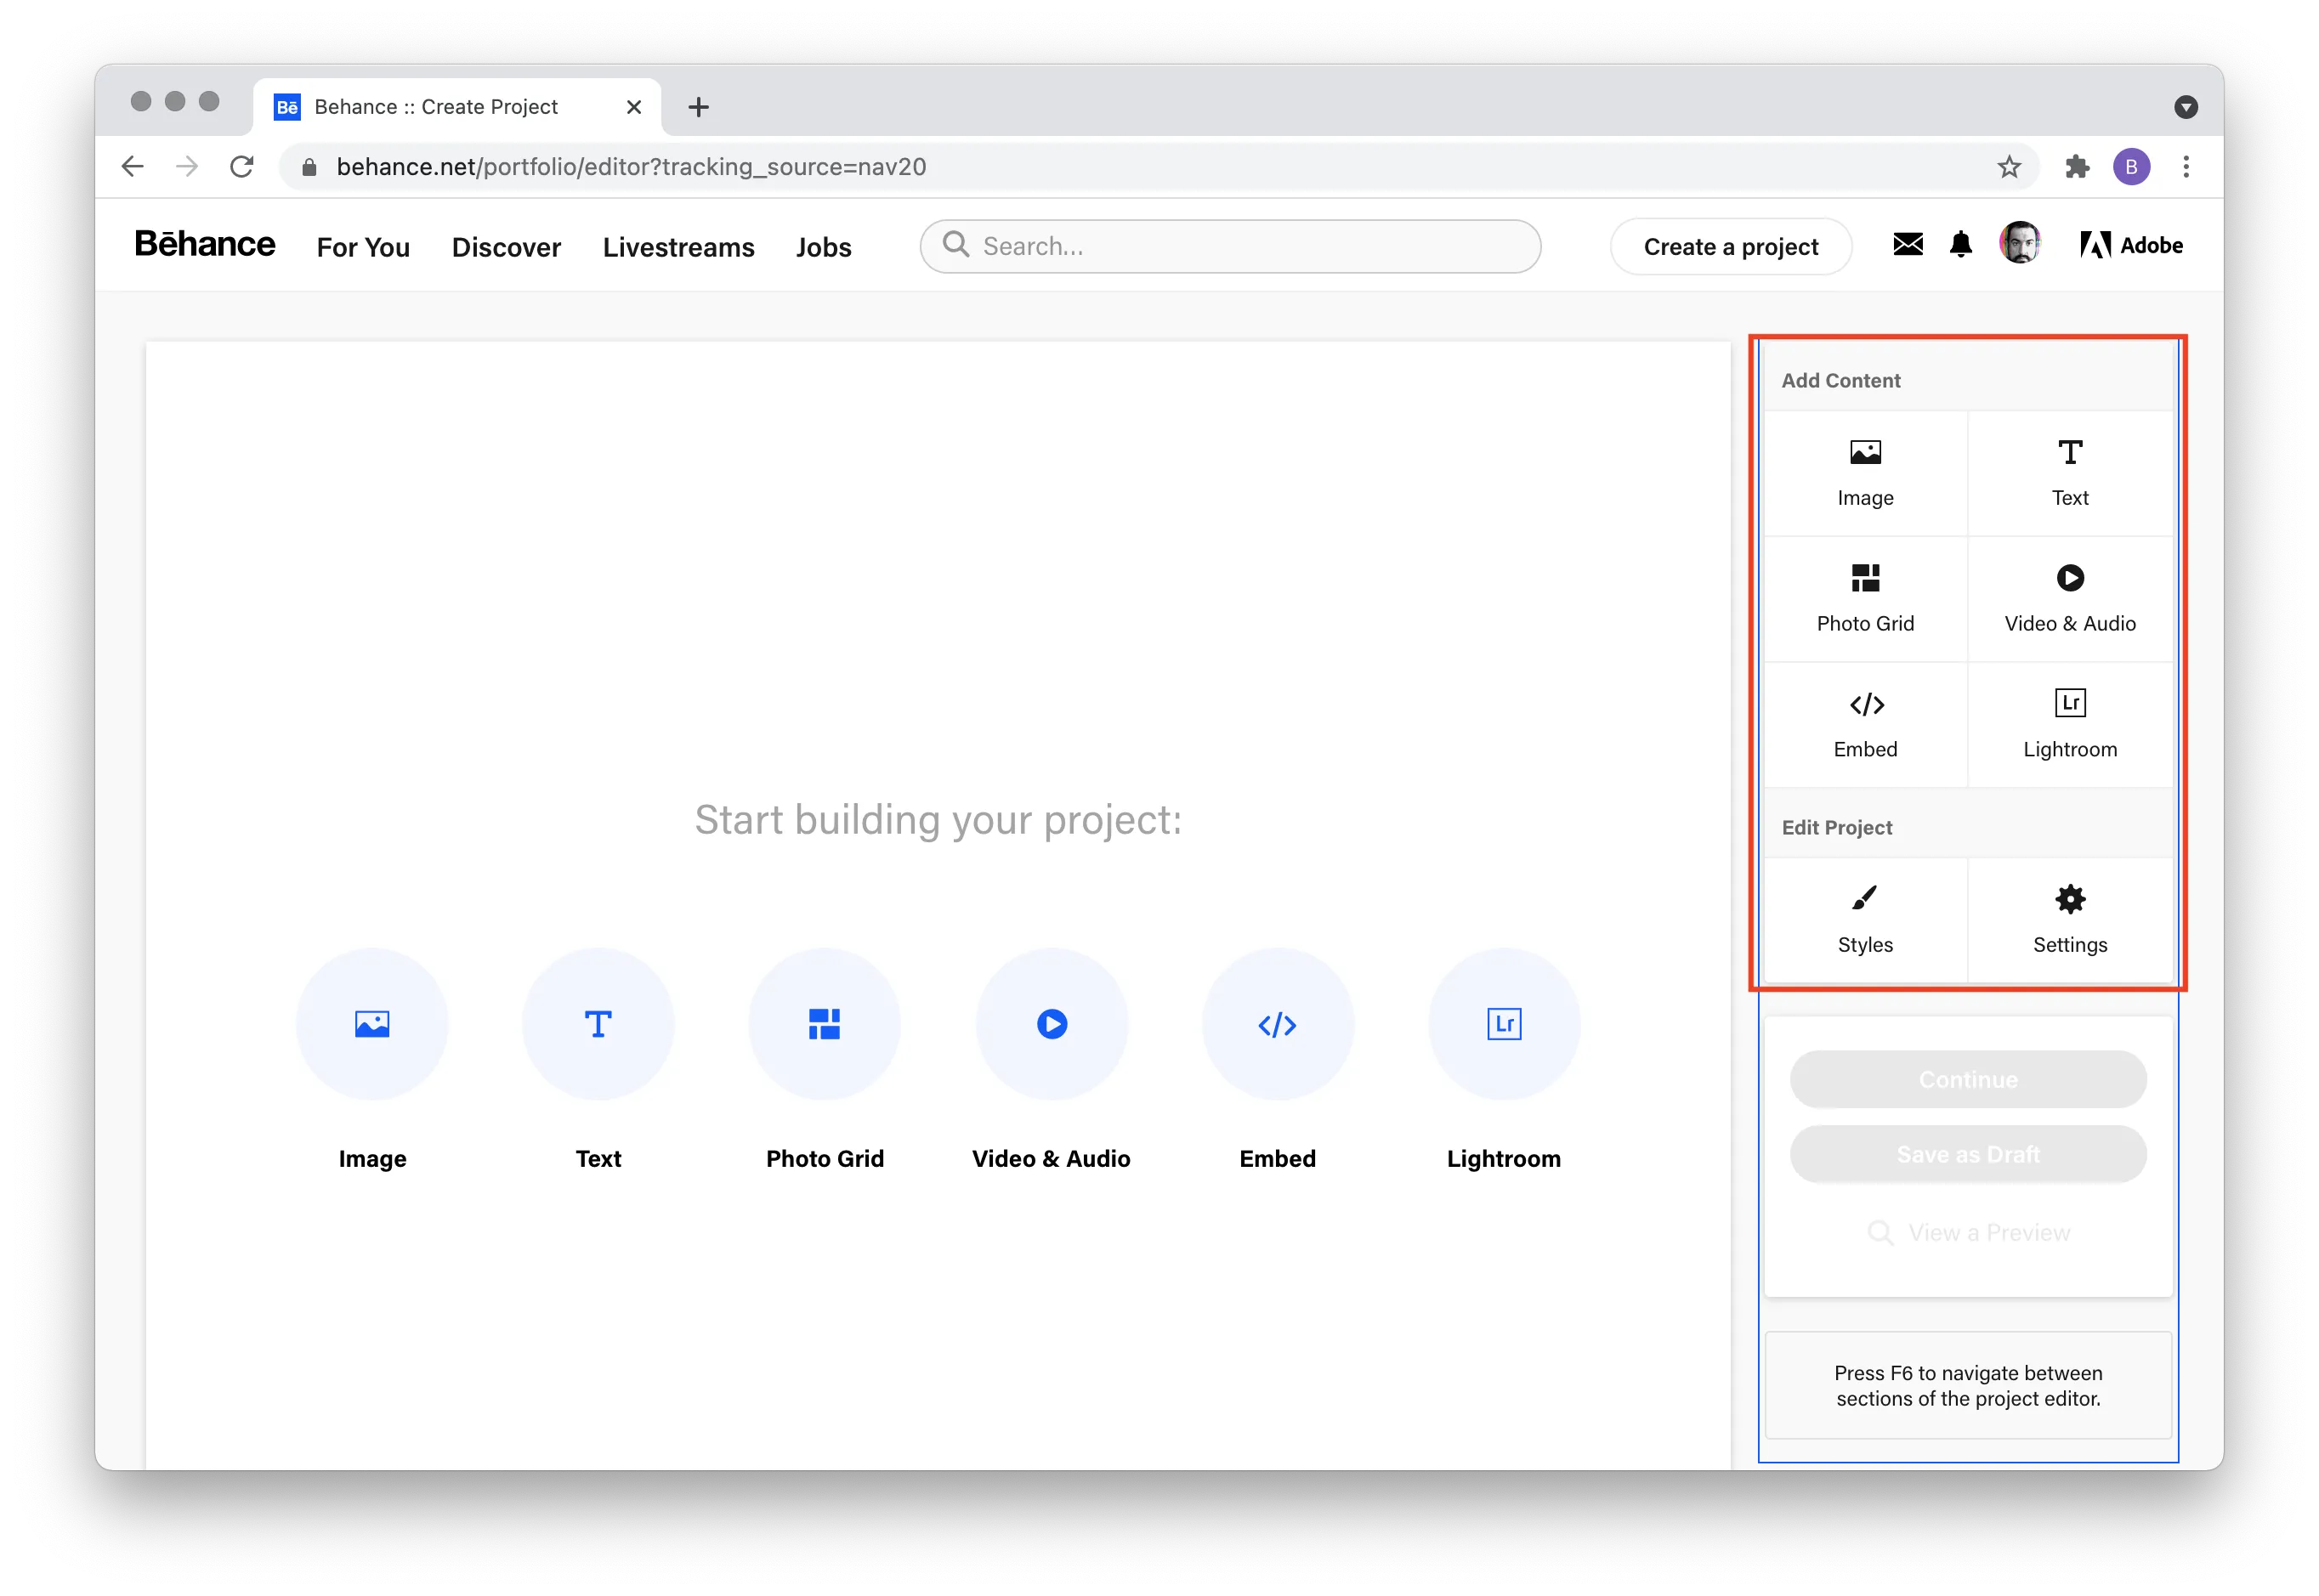
- Upload Your Work: You can drag and drop files, or upload images and videos directly from your computer. Behance supports multiple file formats.
- Arrange Your Content: Organize your uploads by dragging them into your desired order. You can add text descriptions, and even embed links if needed!
- Project Settings: Give your project a catchy title and a detailed description. This is where you catch your audience’s attention!
- Choose Tags: Tags help others find your work. Use relevant keywords to boost your project’s visibility.
- Publish: Once everything looks good, hit the “Publish” button. Your project is now live for the world to see!
And that’s it! You’ve successfully added a project to Behance. Don't forget to share your project across your social media platforms to attract even more viewers!
Also Read This: Understanding LinkedIn Impressions and Their Significance in Analytics
5. Tips for Enhancing Your Project Presentation
When it comes to showcasing your work on Behance, presentation is key! Here are some tips to make your project stand out:
- Use High-Quality Images: Always opt for high-resolution images. Blurry or pixelated visuals can detract from the quality of your project.
- Create a Cohesive Color Palette: Stick to a color scheme that reflects your brand or the theme of your project. This consistency creates a more professional look.
- Tell a Story: Structure your project like a narrative. Start with the problem, show your process, and finish with the final solution. This engages viewers more effectively.
- Add Captions and Context: Don't leave your audience guessing. Provide brief explanations or insights into your work—why you made certain choices or the challenges you faced.
- Include Process Shots: Showing behind-the-scenes images or sketches can illustrate your creative journey and enhance viewer engagement.
Remember, the goal is to captivate your audience and give them a reason to appreciate your work. A well-organized and thoughtful presentation can make all the difference!
Also Read This: Understanding YouTube Lag and How to Improve Performance
6. Finalizing and Publishing Your Project
After you've spent time crafting your project, it’s time to finalize and share it with the world. Here are the steps you should follow:
- Review Your Details: Double-check that all your project details, such as the title, description, and tags, accurately reflect your work.
- Choose the Right Tags: Tags help your project reach the right audience. Think about keywords that best describe your work.
- Set a Cover Image: This is the first image people will see. Choose one that best represents your project and will grab attention.
- Preview Your Project: Before hitting publish, take a moment to preview how your project will appear to others. Look for any tweaks needed in layout or text.
- Publish and Share: Once you're satisfied, hit that publish button! Don’t forget to share your project on social media to attract more viewers.
Congratulations! You’ve successfully added a project on Behance. Embrace the feedback and enjoy connecting with other creatives!
How to Add a Project on Behance - A Quick Tutorial for New Users
Behance is a popular platform for creative professionals to showcase their work and connect with others in the industry. If you're new to Behance, adding a project can seem daunting, but it's a straightforward process. This tutorial will guide you through the steps to successfully upload your project.
Here’s a quick step-by-step guide:
- Create an Account: If you haven't already, sign up for a free account on Behance. You'll need to provide basic information and verify your email address.
- Log In: Once your account is set up, log in to your Behance profile.
- Navigate to “Create a Project”: Click on the “Create a Project” button located on your profile page. This will take you to the project creation interface.
- Add Your Content: You can upload images, videos, or even PDFs. Simply drag and drop your files or click to upload from your computer.
- Organize Your Project: Use the layout options to arrange your images and text. You can add captions and descriptions for each piece of content.
- Include Tags and Tools: Tags help others discover your project. Be sure to include relevant tags and tools used in your project.
- Set Privacy Settings: Choose whether you want your project to be public or private.
- Publish: Once you’re happy with your project, click the “Publish” button. Your project will now be live on Behance!
By following these simple steps, you can easily add your project to Behance and start showcasing your creativity to the world. Remember to engage with the community, as feedback can help you grow as an artist.
Conclusion: Adding a project on Behance is an excellent way to share your creative work and build your portfolio, and with this guide, you can navigate the process with confidence.