Creating a beautiful jewelry box using ice cream sticks is not only a fun and creative project, but it also allows you to repurpose materials that you might otherwise throw away. This craft is perfect for both kids and adults, offering a wonderful opportunity to express your personality through design. Plus, it’s an excellent way to keep your jewelry organized in a stylish and unique manner. So grab your ice cream sticks, and let’s dive into the materials you’ll need to get started!
Materials Needed
Before you begin crafting your jewelry box, gather the following materials. Having everything ready will make your process smoother and more enjoyable. Here’s what you’ll need:
- Ice Cream Sticks: Approximately 50-100 sticks, depending on the size of your box.
- Glue: A strong adhesive like hot glue or wood glue works best for durability.
- Scissors: To trim the sticks if needed, especially for making corners or edges more refined.
- Paint or Stain: Choose colors that match your decor or go for a natural wood finish.
- Decorative Items: Think beads, sequins, or washi tape to personalize your box.
- Craft Knife: Optional, but helpful for precise cuts.
- Sandpaper: To smooth out any rough edges before painting.
- Ruler: For measuring the dimensions of your box accurately.
- Pencil: To mark where you’ll cut or glue.
With these materials on hand, you’re ready to unleash your creativity and turn those humble ice cream sticks into a stunning jewelry box that you can cherish for years to come!
Also Read This: Building a Rewarding Career with Lifeguard Courses
Step-by-Step Instructions
Creating a beautiful jewellery box using ice cream sticks is both fun and rewarding! Let’s dive into the step-by-step process to bring your aesthetic vision to life.
Materials Needed:
- Ice cream sticks (around 50-60)
- Strong glue (hot glue gun works best)
- Scissors
- A small box or cardboard for the base
- Paint (optional)
- Decorative items (like beads, ribbons, or glitter)
Instructions:
- Prepare Your Base: Start with a small box or create a rectangular base using cardboard. This will give your jewellery box structure.
- Lay the Foundation: Begin gluing ice cream sticks horizontally along the sides of your base. Leave a small gap between each stick for a trendy look.
- Build Up the Walls: Once the sides are done, add another layer of ice cream sticks vertically. This adds depth and makes the box sturdier.
- Create the Lid: For the lid, cut more ice cream sticks to fit the dimensions of your box. You can use a single layer or stack them for height.
- Finishing Touches: Paint your box in your favourite colour or leave it natural. Add decorative elements like beads or ribbons to personalize it.
- Let It Dry: Allow everything to dry completely before using your beautiful new jewellery box!
Also Read This: Beginner's Guide to Getting Your Images Featured on Getty
Tips for Customization
Your ice cream stick jewellery box can be as unique as you are! Here are some creative tips to customize your project:
- Colour Variations: Experiment with different colours! Use vibrant paints or even decoupage techniques with patterned paper to add flair.
- Shapes & Sizes: Don’t limit yourself to rectangles. Try making round or heart-shaped boxes for a more whimsical approach.
- Interior Dividers: Consider adding dividers inside your box using smaller ice cream sticks to keep your jewellery organized.
- Personal Touches: Incorporate your initials or a special quote by painting it on the box or using stickers.
- Accessorize: Use ribbons, small charms, or even lace to decorate the exterior. This adds elegance and highlights your personal style!
Remember, the key to customization is letting your creativity shine. Enjoy the process, and you’ll end up with a stunning piece that’s both functional and beautiful!
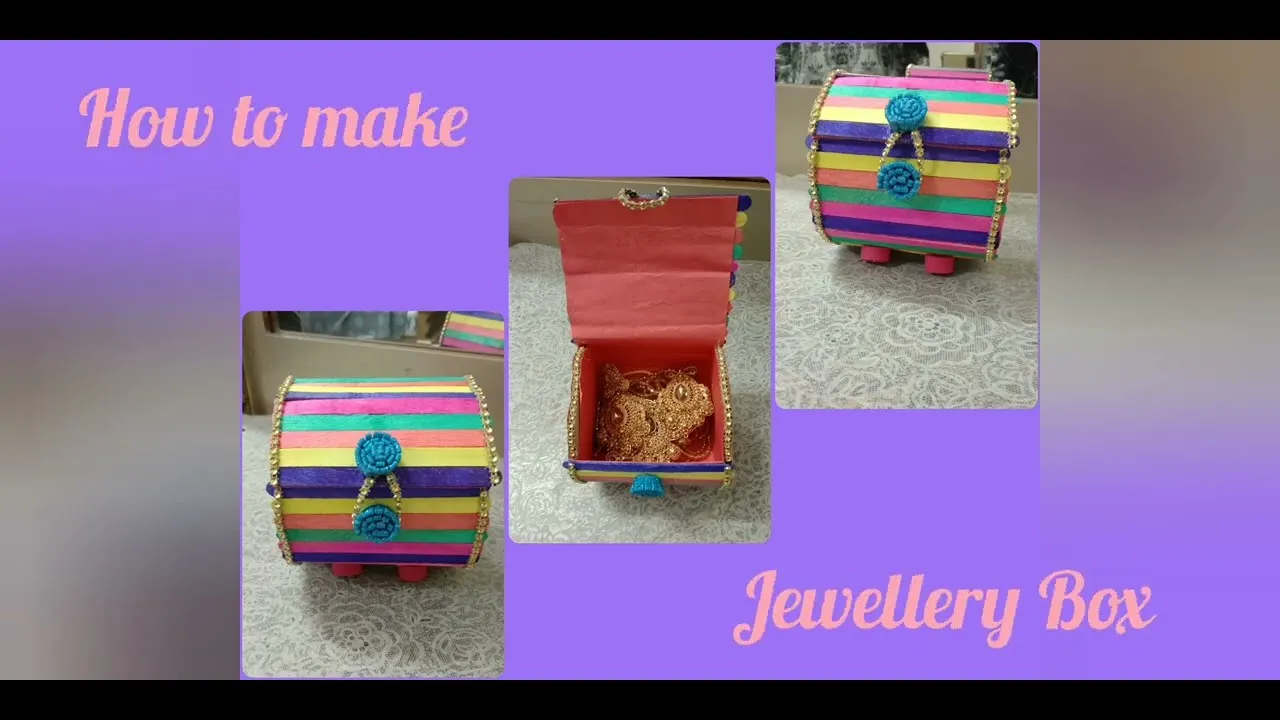
How to Create a Beautiful Jewellery Box Using Ice Cream Sticks
Creating a beautiful jewellery box from ice cream sticks can be a fun and rewarding DIY project. Not only does it allow you to recycle materials, but it also provides a unique way to store and display your cherished accessories. Follow these simple steps to craft your own stunning jewellery box.
Materials Needed
- Ice cream sticks (approximately 50-100, depending on size)
- Craft glue or hot glue gun
- Scissors
- Acrylic paint or wood stain
- Paintbrush
- Decorative items (e.g., beads, ribbons, stickers)
- Felt or fabric (for lining)
Steps to Create Your Jewellery Box
- Design the Box: Sketch your desired design on paper, including dimensions and shape.
- Base Construction: Start by gluing four ice cream sticks together to form a rectangle for the base.
- Build the Sides: Attach sticks vertically around the edges of the base to create the walls. Ensure they are securely glued.
- Add a Lid: Create a separate rectangle using sticks for the lid or a hinged design by attaching a few sticks with tape.
- Paint and Decorate: Once the glue is dry, paint the box in your desired color and add decorative elements.
- Line the Interior: Cut felt or fabric to fit inside the box for a soft finish that protects your jewellery.
Tips for Customization
You can customize your jewellery box in numerous ways:
| Customization Option | Description |
|---|---|
| Color | Choose colors that complement your room décor. |
| Size | Adjust the dimensions based on your jewellery collection. |
| Decoration | Add personal touches using photos, quotes, or embellishments. |
Creating a jewellery box from ice cream sticks is not only an eco-friendly project but also a creative way to organize your accessories. With a little patience and imagination, you can craft a beautiful piece that showcases your style and personality.